
Help Home -> Avanti Help
Please review the help topics below before submitting a request
How To Use Avanti For The Discipline Process
Moving forward, our Avanti platform will be where we document all steps of our progressive discipline program. From verbal warnings, to showing up late for shifts, everything will be documented and acknowledged via the platform. Please note every write up can only have a single Offense, if you wish to write up someone for multiple offenses you will need to fill out multiple forms:
Steps:
Sign into Avanti, and go to Personal tab, and click on the Disciplinary History link.
Let’s take you through the main screen first:

Using the directional arrows (left and right) you can click through the employees you have permissions to add disciplines to their profiles.
The blue “Add Discipline” button is what you press to create a new discipline.
The delete button can only be used before a discipline has been approved.
If you need to make edits to a discipline you have already submitted, you will use the “edit” button.
The “Status” column, is where you can see if the employee has signed off and viewed the approved discipline.
Steps To “Add Discipline”
Use the Blue Help Button To Find Out More Information!
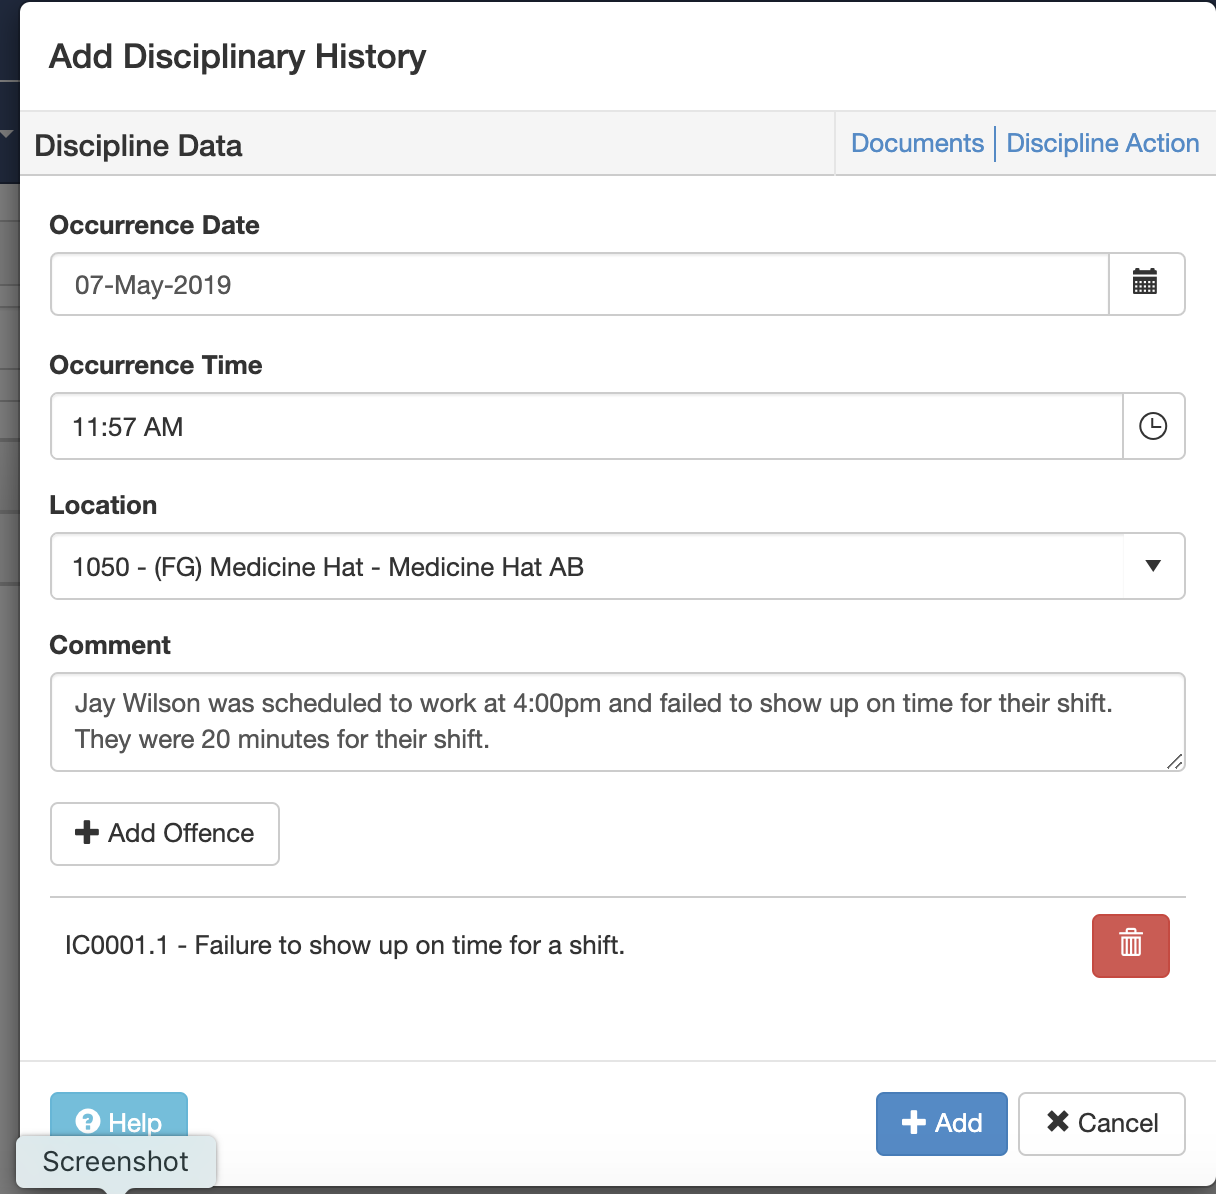
Once you click on the blue “Add Discipline” button, this is the screen that will auto populate for you. (Notice there are 3 screens to click between Discipline Data (Seen here), Discipline Action, and finally Documents
On the Discipline Data Screen, you need to fill out the following:
Occurrence Date: The date of the infraction\offence. What day did the incident occur that you are writing them up for?
Occurrence Time: What time did the infraction\offence happen? For example if you writing someone up for being late for a shift, you would put in the time they showed up for the shift, or if they are a “no call, no show” you would then use their scheduled shift time for the Occurrence Time.
Location: What store did it occur, if your writing up someone who does not reside at a store, use the “Corporate” location in the drop down.
COMMENT: The details of the incident, be specific in documenting who was involved and any damages that resulted. Be direct, brief, and to the point.
Add Offence: Every discipline has to have an Offence, you will notice that each of the Offences are linked to our Employee Handbooks. (Please note only a single offence per write up, please use multiple forms if you wish to write up for multiple offensces)
EVERY BOX AND DROP DOWN NEEDS TO BE FILLED IN TO BE ELIGIBLE FOR REVIEW BY HR!
Please note only a single Offence May Be Used Per Write Up!
USE THE BLUE “HELP” BUTTON LOCATED ON THE BOTTOM LEFT OF THE SCREEN TO GET MORE INFORMATION ON OFFENCE CODES, AND WHAT TO WRITE IN THE COMMENT BOX!
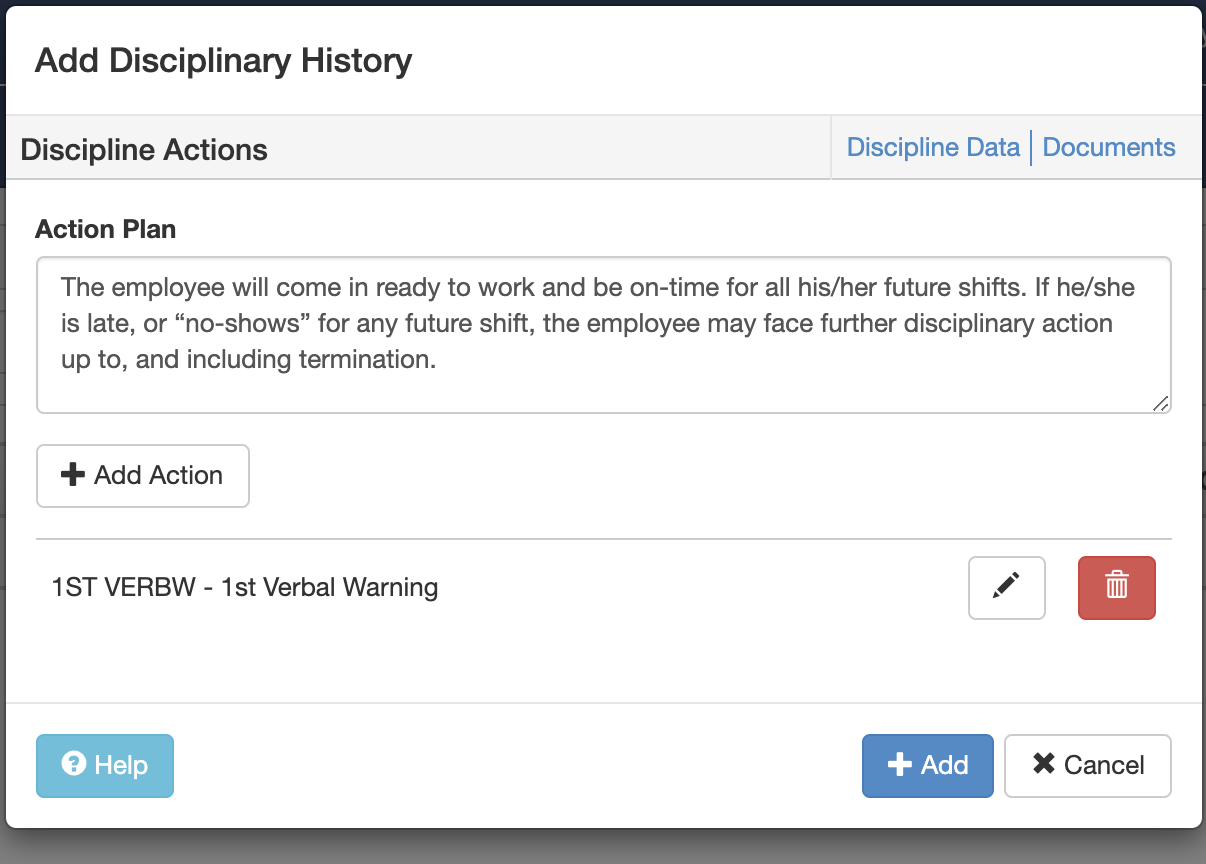

Next, click on the “Discipline Action” link in the top right of the screen
In the “Action Plan” box, a corrective action plan needs to be written to help ensure the behavior is not repeated in the future by the employee. Examples of a corrective action can be, but not limited too:
Reviewing the section of the company handbook
Re-signing the handbook or other company document which contains the policy violation
Or as simple as not repeating the violation, see example in box.
Next, click on the “Add Action” button, you will need to look at the employee’s history to find out if this is a 1st or 2nd Verbal Warning, or 1st or 2nd Written Warning, or if it has been elevated to a Leave of absence
Discipline Action:
1st verbal Warning- Used when there is limited liability or damage done. If the only “victim” is the company, that a verbal warning is what you always want to start with. Examples of verbal warnings would be late for a shifts, or forgetting a piece of the uniform.
2nd Verbal Warning- See examples above, when we are trying to constructively coach an employee we would use a second verbal warning to help get the employee back on track.
1st Written Warning\2nd Written Warning- If the same employee shows up late after two verbal warnings it would be time to move to a written warning, that way you are showing an escalation in the discipline, but we also show we have given the employee other chances to correct their behavior. At times it will be appropriate to skip “verbal warnings” and move straight to written, these examples are when our employees or guests have been put in danger or have been subject to harassment, threats, or even theft! Remember that HR will help you navigate and find the appropriate discipline based on the offence, and EVERY discipline submitted is reviewed before going to the employee.
You would use the second written warning, after completing the first one, and the behavior continues. For example if an employee continually shows up late for a shift, we would do 2 verbal and 2 written warnings before we move to a Leave of Absence.
Leave of Absence (Paid\Unpaid)- These are only used in conjunction with HR, and when previous discipline has been properly documented.
You then need to make sure the following boxes are also filled in:
Action Taken By: Who is reviewing the action with the employee, in most instances it should be the General Manager or Area Manager, but it needs to be filled in using the drop down box.
Action Taken Date: Normally the date of the offence and the action item are different, be sure to put in date in which the action should be completed by here.
Action Taken Time: Give a “general” time of when the person submitting the discipline will sit down with the employee to discuss the “write up”.
Once completed click on “OK”
FINAL STEPS
If you have a document that you would like to add to the discipline file, example a copy of time\temp log, or a copy of the schedule. You just need to click on Documents link, and click on “Add Document” and drag and drop the file.
Before Clicking the “Add” button at the bottom of the main Discipline Screen, you need to review both the Discipline Data and Action tabs and ensure that EVERY BOX has been properly filled in.
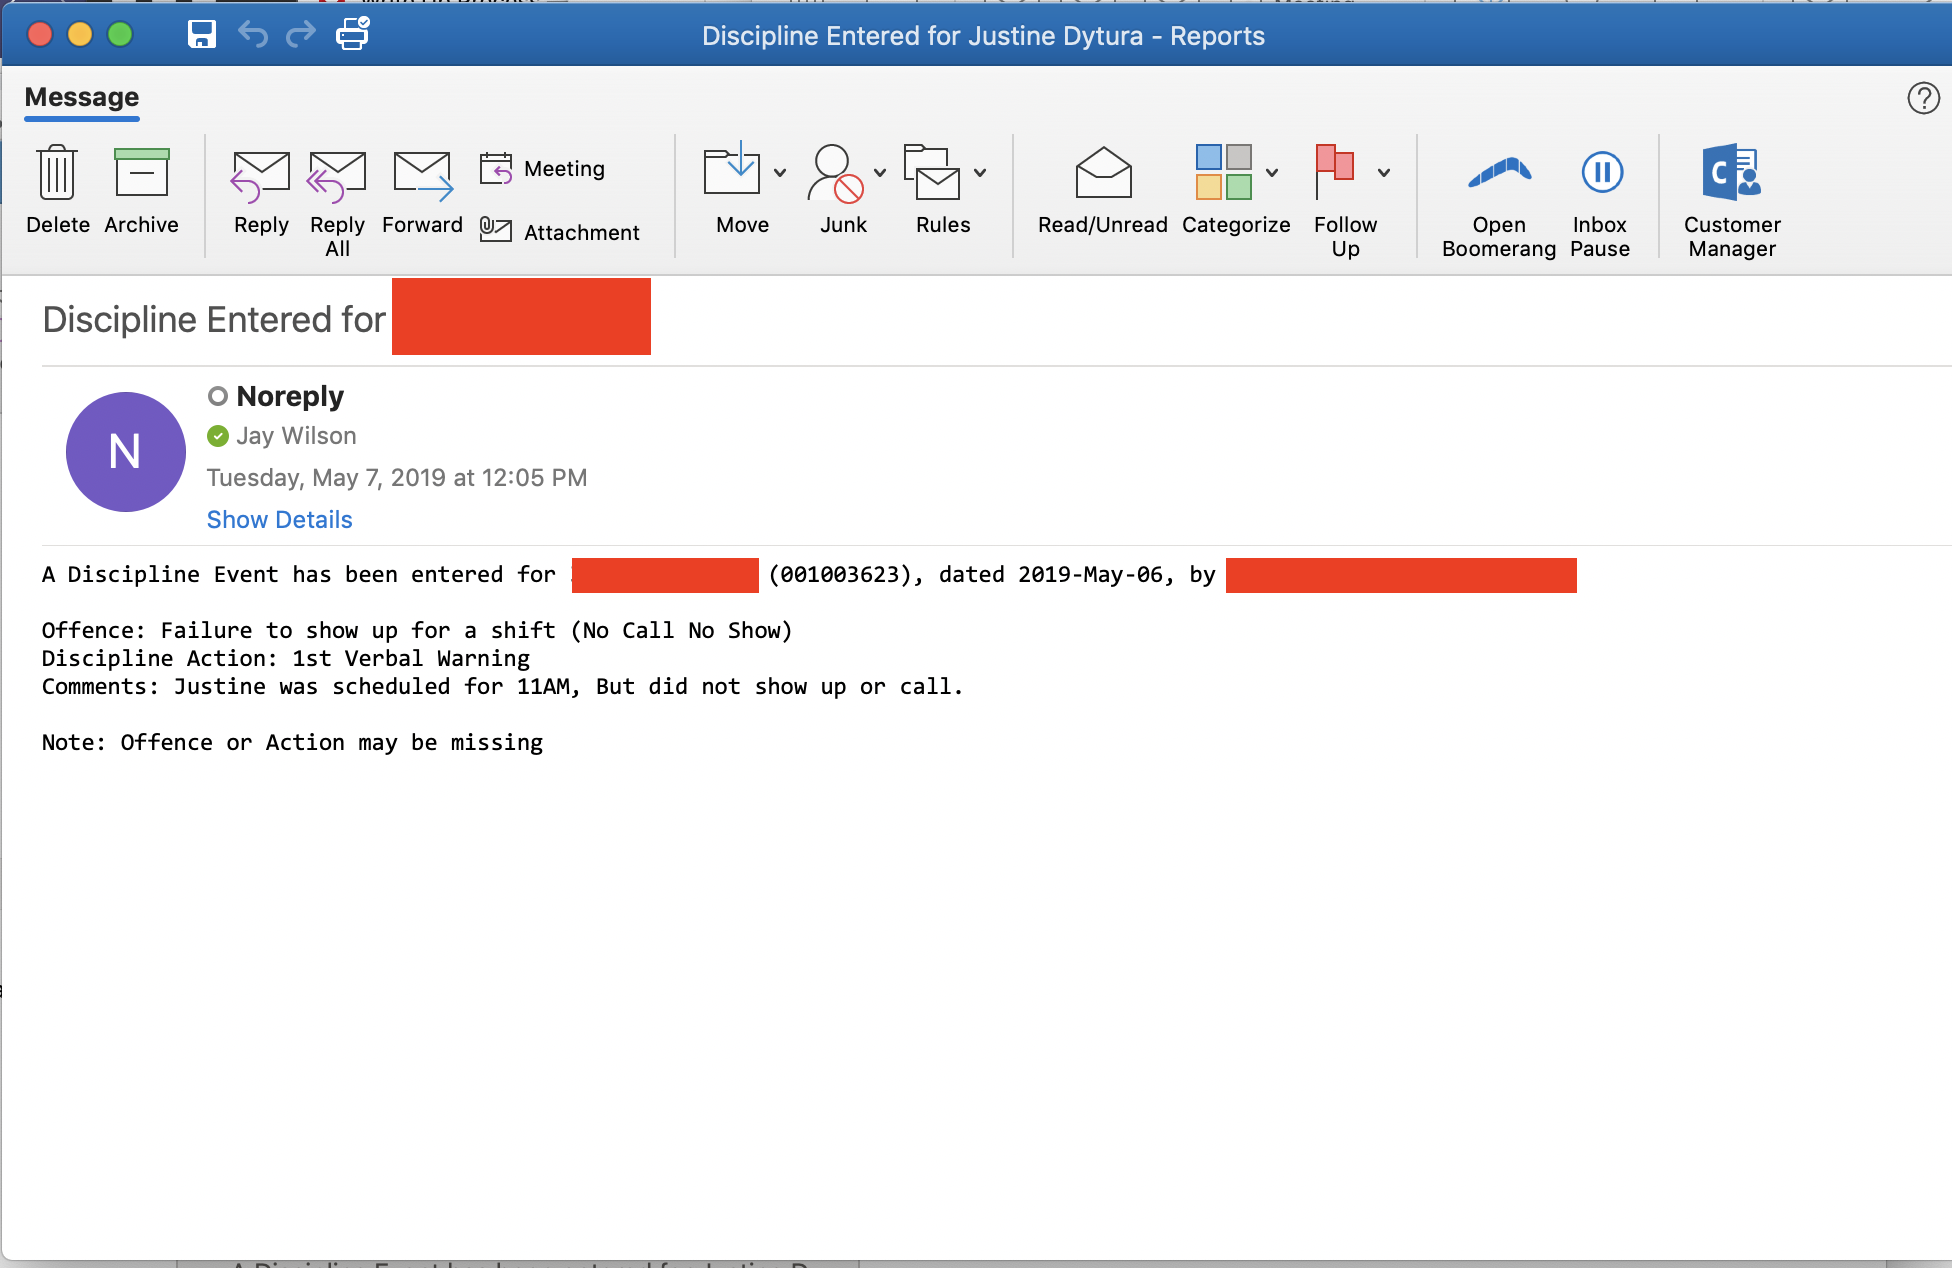
Once you have confirmed, go ahead and click on “Add”. Once you have done this, as long as you have followed all directions above, the HR team will receive a notification that looks this, click here.
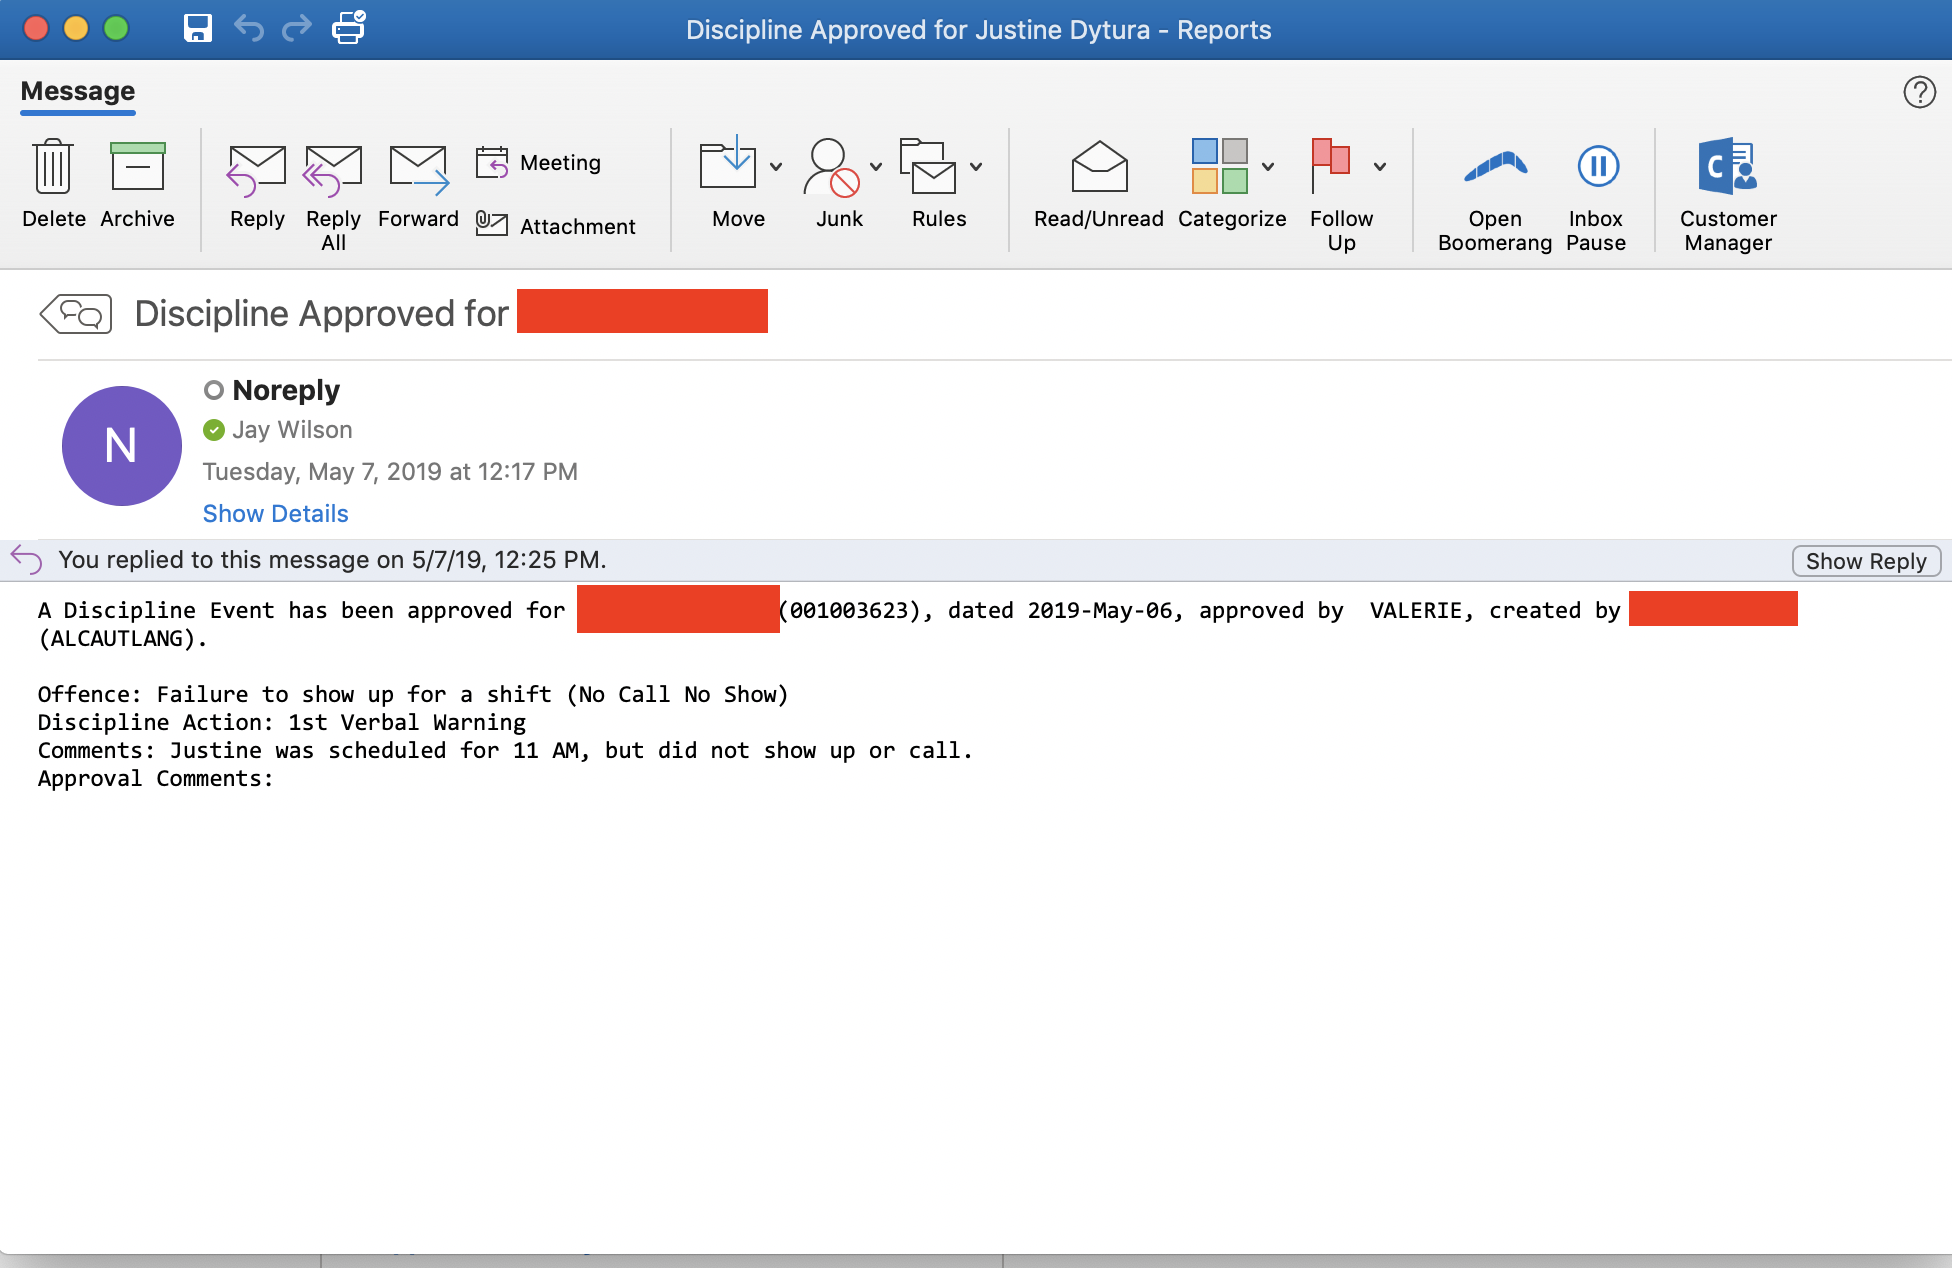
When HR receives the notification, they will review and contact you directly with any questions, edits, changes, etc. Once approved you will receive an email notification that looks like this, click here.
THIS NOTIFICATION ALSO GOES TO THE EMPLOYEE, WE WILL THEN BE ABLE TO SEE WHEN THE EMPLOYEE VIEWS THE DISCIPLINES AND ACKNOWLEDGES IT, AS WELL AS ANY NOTES THEY WOULD LIKE TO ADD TO THE FILE.
Now if you would like to see the whole process from start to end, please check out the video below!